![Copy of STATIC 1.png]](https://help.aptimyz.com/hs-fs/hubfs/Copy%20of%20STATIC%201.png?height=50&name=Copy%20of%20STATIC%201.png)
IMPORTANT NOTE:
You can only install the Aptimyz App in your Clover Store / Location, if you are logged into Clover as the owner of that Store / Location.
- The following article lists the types of Onboarding available to Aptimyz customers.
- Each section shows a different type of business configuration and the choices needed in the Onboarding process.
- These instructions assume you have received your Clover equipment and Clover id (in an email from Clover).
- For information on how to install the Clover equipment please see the Clover website for their downloadable installation files.
- Please be aware the content of any website outside the direct control of Aptimyz.com is outside the control of Aptimyz Ltd and we cannot be responsible for the content of these files.
Clover Dashboard
Before installing Aptimyz, please ensure you have entered the following information in your Clover system. The Aptimyz software imports this information from Clover:
- Add Tax rates
- Add Employees (Please ensure you use real email addresses for the manager and any staff who need access to the back office)
- Click on “More Tools” on the Left hand menu bar

4. Search all apps on right top corner search box for: Aptimyz
5. Click on single green "A" Retail option
6. Click on Connect
7. Accept the “Install Retail”
8. Follow screen cues to set up the Aptimyz Back Office.

Aptimyz Boarding
-
Aptimyz Boarding has been designed to be simple and effortless.
-
Please see Onboarding for Different Business Configurations to board your particular business correctly.
-
After Onboarding, please go directly to Setup and add your local Taxes
-
Please complete your Onboarding by checking your Receipt details and the Barcode Label choices.
Other Setup Pages
Business Settings
- See Multi Site or Single Store help pages
Business level settings
-
Business > Setup > Configuration : Check Configuration is correct
-
Business > Setup > Barcode Labels : Change or add the label design suitable for your business barcode labels.
-
Business > Setup > Gift Card: Assign all the standard Gift Card amounts for the POS.
-
Business > Setup > Loyalty: See up your loyalty points earn and redeem values
-
Business > Setup > Barcode Labels check print barcode label layout.
-
Business > Inventory: Check inventory settings (loan/layaway settings)
Store Settings
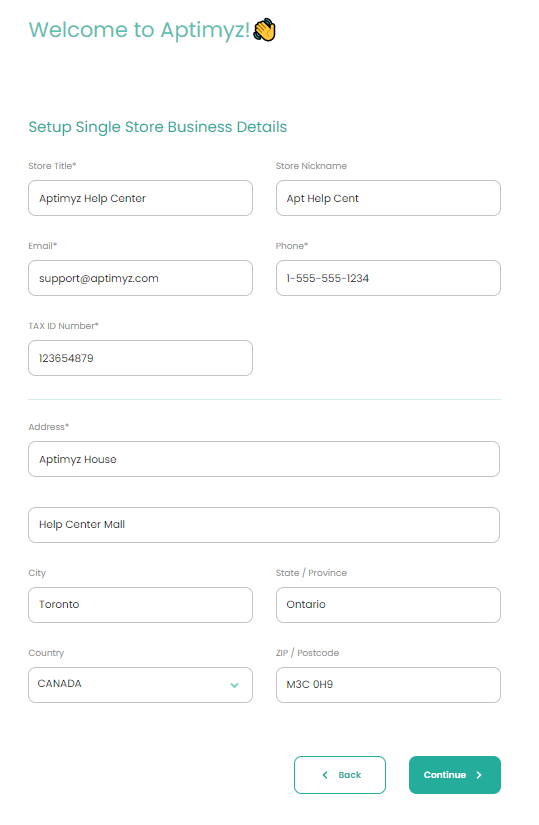
- Setup > Store > : Check details/time zone and nick name
- Setup > Store > details: Make nick name = store short code in the inventory import excel file
- Setup > Store >: Create Tax Rates : QST = 9.975%, GST = 5%, Exception = 0%, First Nation = 0% and Create Tax Groups: Sales Tax = QST + GST = 14.75%, Exception = Exception = 0%, 1stN = First Nation = 0%.
- Setup > Store >: Check receipts and add logos if required
- Setup > Store >: Options – Returns expiry
- Setup > Store >: Inventory settings
- a. Order number starting sequences
- b. Stock Check Mode: we suggest Accumulative
- c. Barcode choices
- d. Assorted POS expiry dates
- Setup > Store >: Staff – enter once to bring all Clover details down to Aptimyz
- Setup > Store >: POS Settings
- Setup > Store >: Quick Buttons (if needed)
POS Setup
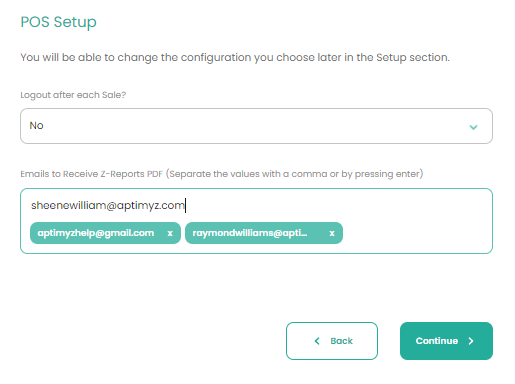
- Logout after each sale
- Emails to receive daily Z-reports
See More
Loyalty
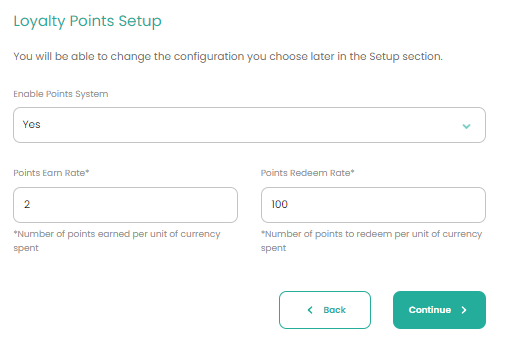
- Enable points system (Y/N)
- Points Earn Rate - Number of points earned per unit of currency spent
- Points Redeem Rate - Number of points to redeem per unit of currency spent
Staff

- Enable Employee Commission
- Employee Default Commission % Rate
- Default Commission Threshold Value
- Commission Calculated on Gross Sales or Profit
- Commission for All Sales ("No" for only above threshold)
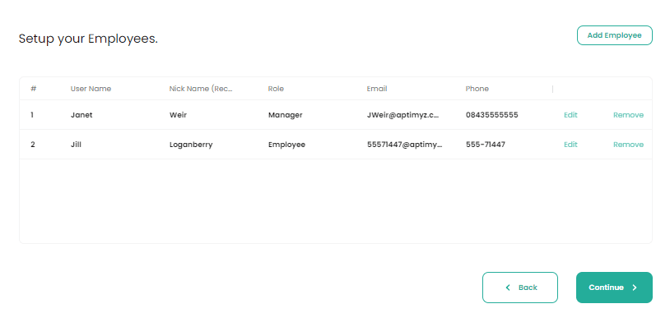
Adding Employees
- All Employee data comes from your Clover account.
- All POS users MUST have a Clover employee id and passcode.
- If you already have a Clover login and employees, their details will be passed to Aptimyz on completion of the Setup, please see More at the end of this section)
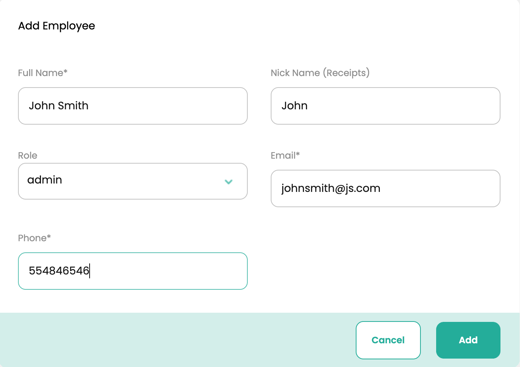
- Full Name
- Nick Name (to go on receipts)
- Role (Employee / Manager / Admin)
- Email (need a “real” email if access to Aptimyz back office is required, otherwise please enter <name+store>@aptimyz.com, this will not create an email address, but will enable the addition of the employee)
- Phone
Permissions
- The page is divided into the 3 staff groups - Employee, Manager, Admin. Each group can have very specific permissions within Aptimyz.
- All permissions can be amended in the Setup section after Onboarding or whilst using the system.
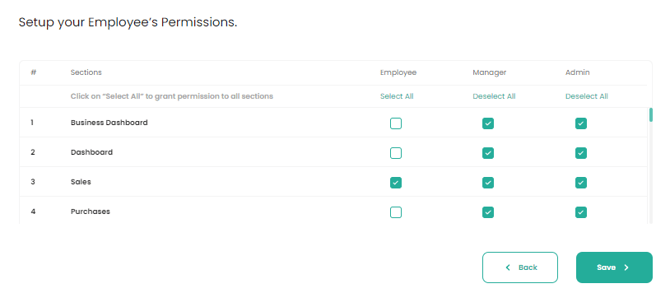
- Setup your Employee’s Permissions
- Either select the specific permissions you wish your staff groups to access or click on “Select All” to grant permission to all sections.
Should any of these settings need to be changed, please search for the relevant help files from the main screen of Aptimyz Help Center