![Copy of STATIC 1.png]](https://help.aptimyz.com/hs-fs/hubfs/Copy%20of%20STATIC%201.png?height=50&name=Copy%20of%20STATIC%201.png)
BigCommerce Back Office
- Login to your BigCommerce back office
- Navigate to Advanced Settings > API Accounts > Create API Account.
- Create: choose a V2/V3 API token
- Give the account a name (it will only be visible to store users).
- In the OAuth Scopes section, you will see the following screen:
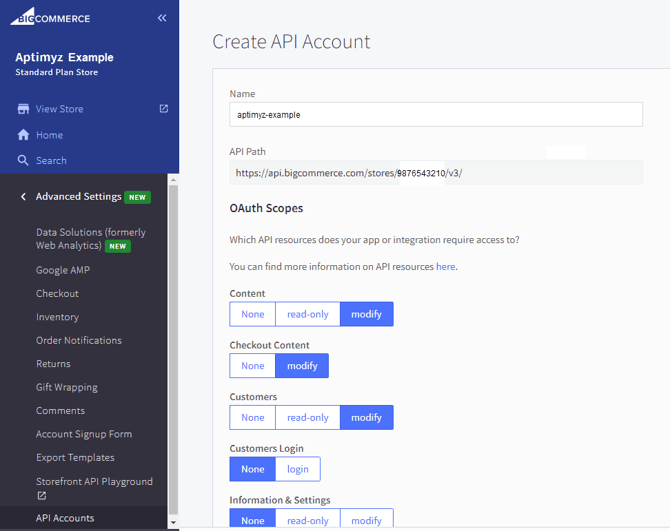
Please select the following settings
a) Content - modifyb) Checkout Content - modify
c) Customers - modify
d) Orders - modify
e) Order Transactions - modify
f) Stored Payment Instruments - modify
g) Products - modify
h) Carts - modify
i) Checkouts - modify
j) Channel Settings - modify
k) Channel Listings - modify
l) Storefront API Tokens - manage
m) Storefront API Customer Impersonation Tokens - manage
6. Select Save.
7. You will then have displayed a BigCommerce API Credentials screen showing Client ID, Client Secret and Access Token
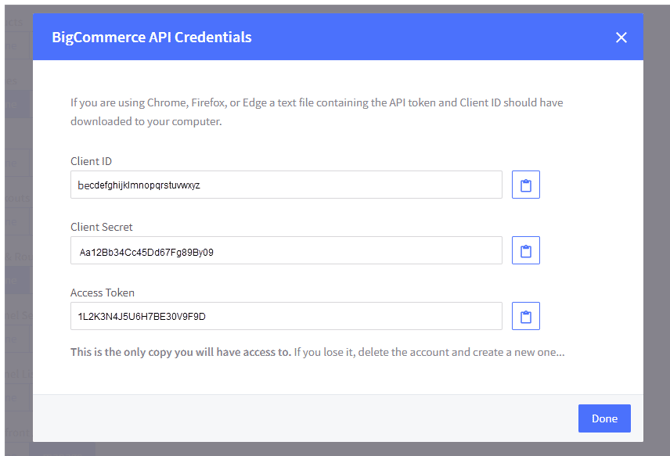
8. If you are using Chrome, Firefox, or Edge a text file containing the API token and Client ID should have downloaded to your computer. Save the downloaded file somewhere safe - you will need it later.
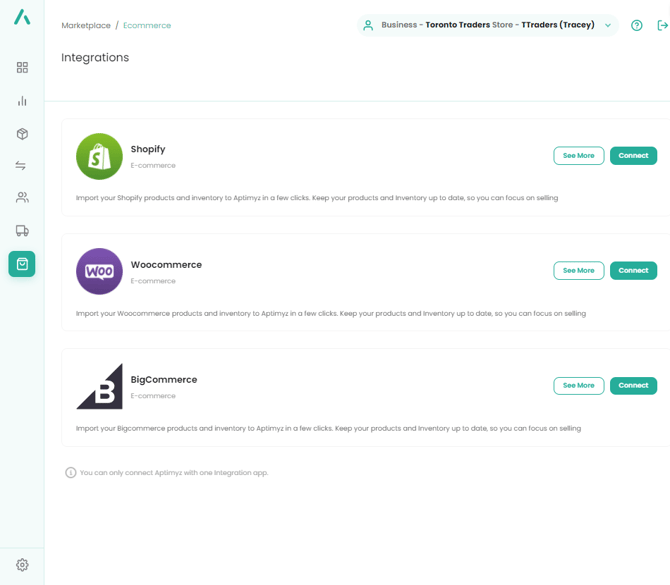
Aptimyz Back Office
-
Login to your Aptimyz back office
-
Select Marketplace
-
Select Ecommerce
-
Select Connect against the BigCommerce line
-
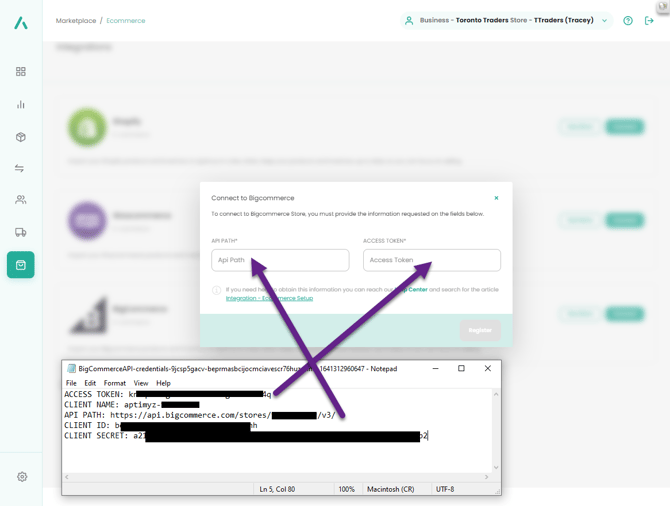
Using the information from the BigCommerce API Credentials download file, fill in the API Path and the Access token (we advise using cut and paste to minimise errors)
-
Register
-
Sync (this will synchronize your products from BigCommerce into Aptimyz)
-
Proceed

-
Select the Stores you wish to connect:

a) Put Stock Online - this registers which stores stock quantities you wish to add to the online store
b) Receive Online Orders - this registers which of your stores receives the primary online order notification
10. Continue and Confirm the store selection
11. The system will display the number of products to be synchronized, please press Continue.
12. There will be a counter showing at the bottom of the screen as the products are transferred.
13. When the synchronisation is complete, go to Inventory > Imported Tables