Reports - Taxes
This article will take you through the steps to create a Tax Report
Steps to producing a Tax Report
-
Select ‘Reports’ on menu, followed by ‘Taxes’

-
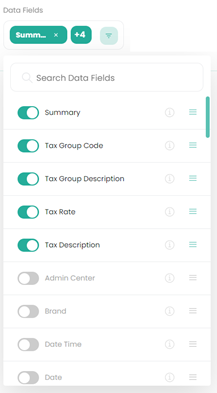
Select your data fields.
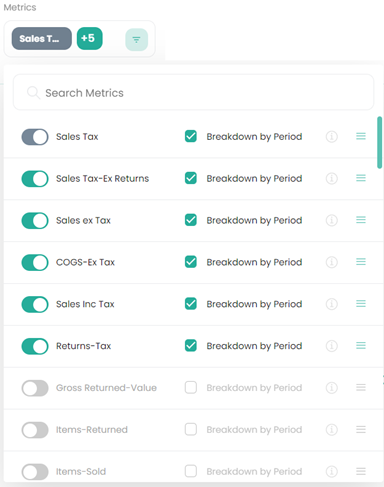
3. Select your metrics.
• If the report is focused on tax, we recommend the following,
• Ticking ‘Breakdown by Period’ for each of the metrics will give a breakdown of the data even further on a per period basis)
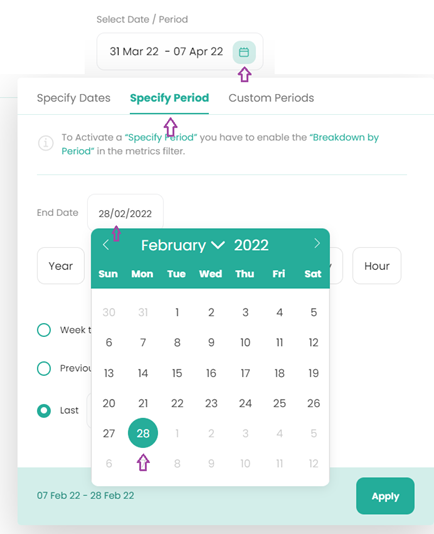
4. Select ‘Select Date / Period’, followed by ‘Specify Period’.
a) When selecting a date range, one has the choice of analysing the metrics chosen (as determined by ticking ‘Breakdown by Period’) on a hourly, daily, weekly, monthly, quarterly or yearly basis.
b) For this report, we propose selecting ‘Week’ and ensuring the end date of analysis is up to the end of the month.
c) We have selected the 28th February, but one can choose the end date of the month of their choice.
d) Tick next to ‘Last’ and tick the up arrow, bringing the number to 5. This will display the last 5 weeks from the 28th February.
e) Click ‘Apply’ to ensure these parameters are saved
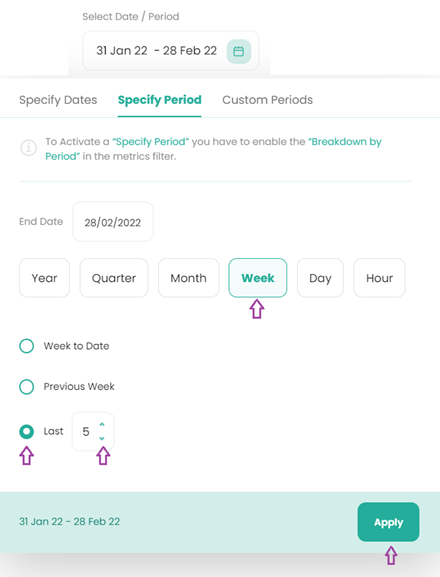
Note: The system defines a week as Monday to Sunday. Therefore, in this example, as the 28th February falls on a Monday, it looks back on just that Monday, the next week is from the Sunday to the previous Monday and so forth.
5. Select ‘Generate Report’ and the report will be run:
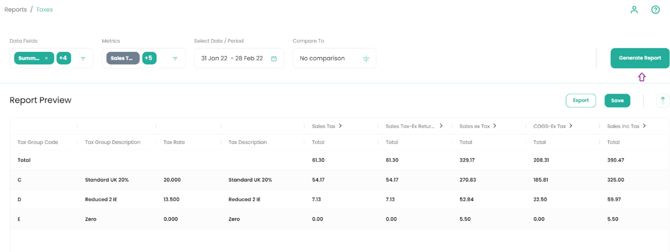
6. Export and/or Save to My Reports
• Reports can either be run on an ad-hoc basis and exported immediately to Excel or CSV. If the report is large, the system will email the report to the user’s provided email address.
• Reports that are useful for regular analysis can be saved into the "My Reports" section.
• Reports can be saved by clicking ‘Save’. When exporting, one has the option of exporting to CSV or excel.
• This is found on the ‘Reports’ menu bar.
For more information about your Saved reports, please read the article on My Reports
![Copy of STATIC 1.png]](https://help.aptimyz.com/hs-fs/hubfs/Copy%20of%20STATIC%201.png?height=50&name=Copy%20of%20STATIC%201.png)