![Copy of STATIC 1.png]](https://help.aptimyz.com/hs-fs/hubfs/Copy%20of%20STATIC%201.png?height=50&name=Copy%20of%20STATIC%201.png)
This article covers the following POS help
Logging inOpening the Till
Alerts (E-commerce)
Standard Sale (Cash or Card)
Customers (Searching and Adding)
Products (Searching and Adding)
Logging in
- Log into the till with the passcode you have been given
- Press on the Retail button to launch the Aptimyz POS
- The first login of the day will be responsible for adding the float to the till.
Opening the Till
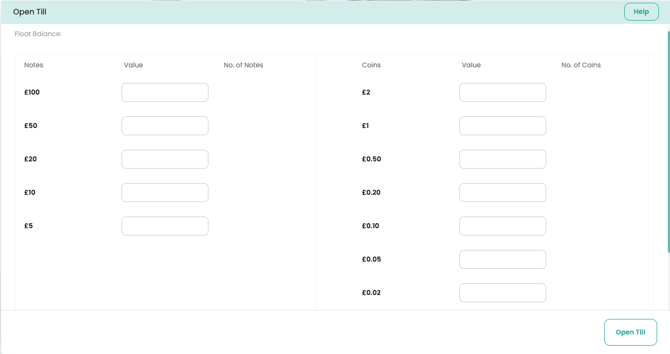
- Complete your Cash float amounts by entering the actual value of each denomination in the Value cell.
- When you have balanced your till float – tap Open Till

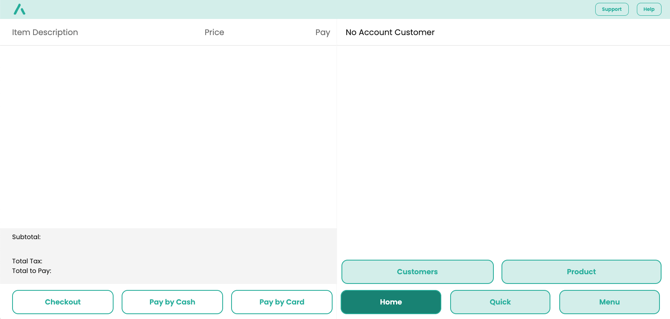
Main Screen
Ecommerce order alert (only for stores connected to Ecommerce websites)
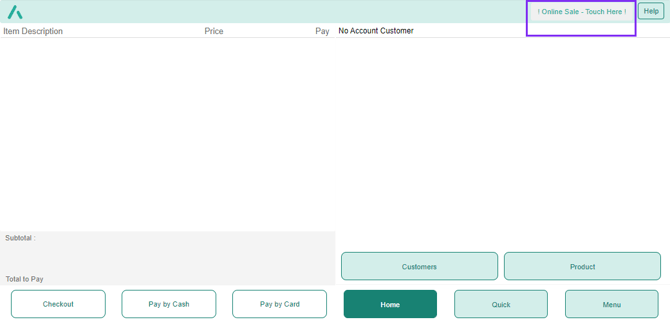
- When the Ecommerce Alert flashes, it means that an order has arrived via your website. Please click on the ! Online Sale - Touch Here ! notification.
- A list of all current online orders will be shown on the screen

- Select View on the order you wish to fulfil
- The order will then be displayed

- Select Print Item List and a packing/shipping note will be printed, with details of the original order, any notes and a delivery address
- The details of the order are now in the Aptimyz system and can be found under the Transactions / Sales menu
Taking a Payment by Cash or Card
- Scan the products using the barcode scanner (they will list on the LHS of the page)
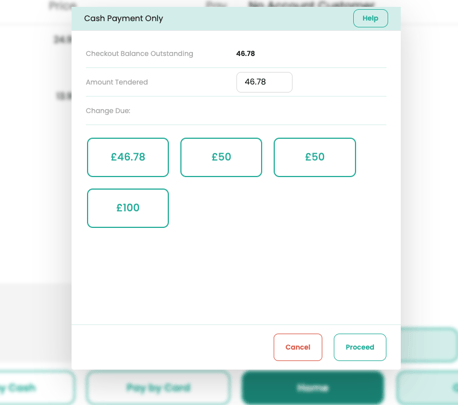
- Select Pay by Cash or Pay by Card
- Process payment via Cash (enter amount tendered, the system will inform you how much change they require) or Card (the payment process will move to the Clover Card payment facility)
Customers
Search Customers
- At any point during the sale process, either before the articles are scanned or just before the order is complete select Home and then Customer Search
- Search for the customer and accept. This will load the customer details on the POS and will apply any special terms they have, e.g. loyalty points or special discounts.

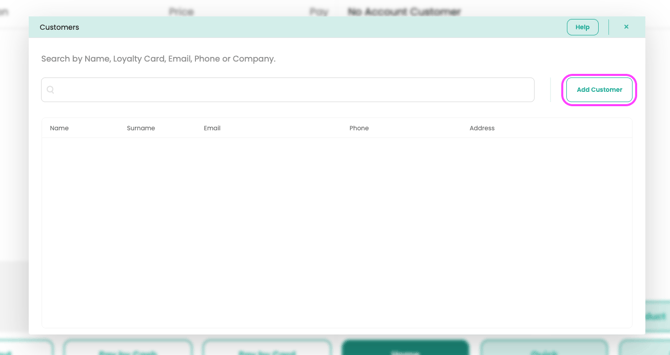
Add a Customer
-
In Customer Search, select Add Customer
-
Add Names and Phone Number
-
Add Name, Surname, Email and Contact Number

-
Select Save
Products
Search Products
- Should the scanner not work, or in the event of a lost or unreadable barcode, use the Product Search key and enter a search term in the search field or scan a similar item in another size/colour

- Select the Product you were looking for. You will then be presented with a Stock list of all the variations for that product, with stock available and RRP

- Add the appropriate stock product, close the windows and continue the sale to completion as before.
Add an Unallocated Product
-
If the product has no barcode, has a barcode that is not recognised by the system and you cannot find it in Product Search, then use the Unallocated button.

-
If you have scanned a barcode, then the barcode will appear on the top line.
-
Enter the description of the article, the quantity bought, the price and the Tax rate.
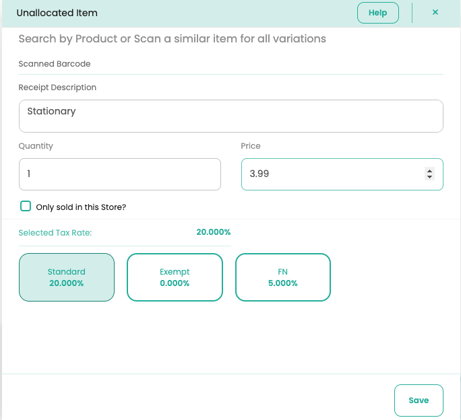
4. Select Save
5. Finish the sale as above- Note: If the same product is scanned again, even on a new order – it will return the details entered the first time.