
This article will show current users the changes we have been working on to extend the ability and ease of importing inventory.
Depending on the need for imports, please check that you are selecting the correct option:
Main Product Integration
Primarily, this feature is utilized to integrate new products that are not currently in the system.
Its expansive capabilities also allow for global modifications on existing products, including updates on prices, product categories, brands, and suppliers. Such alterations are generally performed at the business level as they are universally applicable to all stores.
Stock Quantity Update
This import, designed for simplicity, is ideal for rapidly updating large stocks. It operates with SKU and/or Item No. qualifiers and has the additional function of updating tax groups.
This particular feature functions at the store level, as the quantities and taxes require individual management for each store.
For new users of Aptimyz, to proceed with the steps below, please have your exported CSV or excel file saved and ready to access
Importing your inventory
- From the main menu, select Inventory > Imported Tables Beta

- Select Import

- Import Products

- Add File and select your sheet

- Continue
- After uploading the file, it's time to match columns. If you are using data exported from a different retail platform, the options may appear different to Aptimyz. However, the data has been matched automatically for compatible data to be imported. Therefore reducing manual work to fix it.

- You may notice that some of the columns do not appear as being selected

- If this column includes data that you wish to import, you can select the column and from the drop down list, select 'keep as unmatched'. This will allow you to reference the column when editing the table

- Continue
- Proceed
- Aptimyz will now read the table and search for any errors

- Errors will appear as below and must be fixed to continue with the import
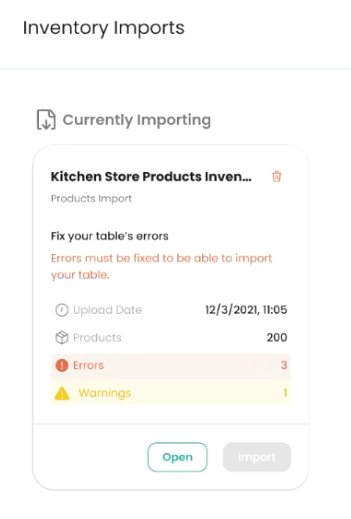
- Select Open
- This screen will show errors where the information was missing from the table for you to complete

- The number on the right hand side will show you how many errors there are in total. By selecting this box, a dropdown will appear with further details.

- By selecting the highlighted red box, you can complete the missing information
- If your import sheet has pictures attached, you will see that these have also appeared. There are several options available to amend these images. By selecting the image, you can view, attach, re-arrange, delete images and change the main thumbnail

- If there is a product with no image attached, select the box to upload an image

- Additional photos can be uploaded using a URL

- Another new feature is bulk editing. The example below will show how to change the quantity of products
- Select the 3 dots on the right hand side to reveal a drop down list of options. Select the option

- The next screen shows that all items are automatically selected

- Un-select any that you do not want the changes to be applied to
- Enter quantity amount and select Apply to all

- All quantities have now been updated excluding the 1 item that was un-selected

- To be able to import the table, the errors need to be fixed by selecting and entering the correct data
- Once this has been completed, 'Import' will be highlighted indicating that the sheet is ready

- Confirm

- Import
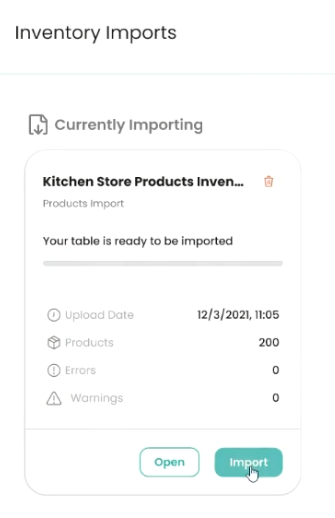
- Your import has now been completed and will run in the background. Once the status has changed to complete, your products can be found within your inventory
**This is the end of this article**