![Copy of STATIC 1.png]](https://help.aptimyz.com/hs-fs/hubfs/Copy%20of%20STATIC%201.png?height=50&name=Copy%20of%20STATIC%201.png)
To bulk add customers via a CSV or excel file, please download this file and open in a spreadsheet application (Excel, Numbers, etc)
Aptimyz Customer Import file
Completing the Customer import file
- Acceptable characters A to Z upper and lower case. All of the following ( ) [ ] - + = & \ / < > , and currency symbols. Please consider all other characters including single and double quotes as not acceptable.
- NOTE: Check for any unwanted characters in other parts of the import file as these will be saved in the file and will cause the import to fail.
- Saving the file. NOTE: this file MUST be saved as a .csv or xlsx file before importing
Customer Import File – columns and cell format
Mandatory Fields
• Column A: Email Address: Usual email format “name@domain.extension",
• Column E: First Name: Up to 50 characters,
• Column F: Last Name Up to 50 characters,
• Column G: Phone: Up to 30 characters,
Optional Fields
• Column B: Company Name: Up to 100 characters, if Credit Account field is set to Yes then this field is mandatory
• Column C: Account Number: Up to 20 characters Only used if Aptimyz is attached to an accounts package.
• Column D: Partner’s Name: Up to 50 characters
• Column H: Comments: Up to 1000 characters
Address Details
• Column I: Address Label: Up to 255 characters. This is used as the title of the address, such as “Home”, “Parents House”
• Column J: Address 1: Up to 100 characters
• Column K: Address 2: Up to 100 characters
• Column L: Town / City: Up to 100 characters
• Column M: County / State: Up to 100 characters
• Column N: Postcode / Zip: Up to 10 characters
• Column O: Country: 3 Characters, use the International ISO code
e.g. USA = USA, Canada = CAN, UK = GBR, Ireland = IRL,
Account Balance and Credit Terms
• Column P: Account Balance, Decimal Number in format 9.2 (nnnnnnnnn.nn). Any number up to 999,999,999.99 can be input.
Positive number if the customer has money deposited in their account.
Usually negative if they are a credit account customer
• Column Q: Discount %, decimal Number in format 3.2 (nnn.nn).
NOTE. Do not add the "%" symbol after the number.
• Column V: Credit Account: Either “Y” or “N”, This will default to “N” if blank.
• Column W: Credit Limit: Decimal Number in format 9.2 (nnnnnnnnn.nn).
• Column X: Credit Terms: Number up to 999. This represents the number of days to pay an invoice. These terms are listed on the POS receipt
Loyalty and Marketing
• Column R: Loyalty Card Number/ Barcode, up to 30 characters
• Column S: Loyalty Points Balance: Number
• Column T: Marketing Allowed: Either “Y” or “N”. This will default to “N” if left blank.
• Column U: Email Receipt to Customer: Either “Y” or “N”. This will default to “N” if blank.
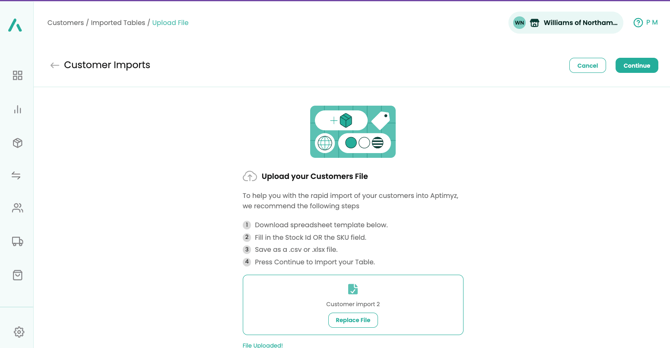
Importing the Customer file
- On a web browser, log in to your Aptimyz account
- Select Customers
- Select Imported Tables Beta
- Select Import
- Select Add File
- Find your csv or xlsx file in the file listings
- Select Process
- Select Continue
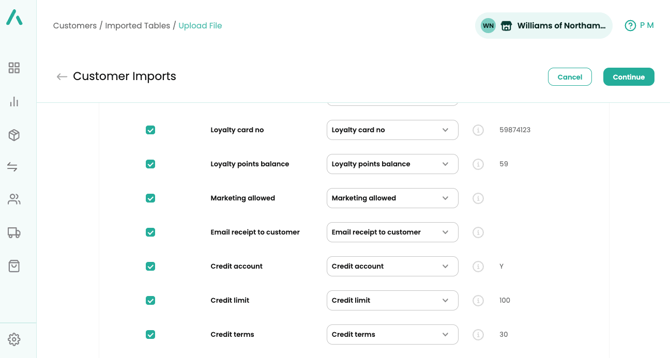
9. In the next screen, you have the option to check that the columns match up to the Aptimyz Suggested Columns.
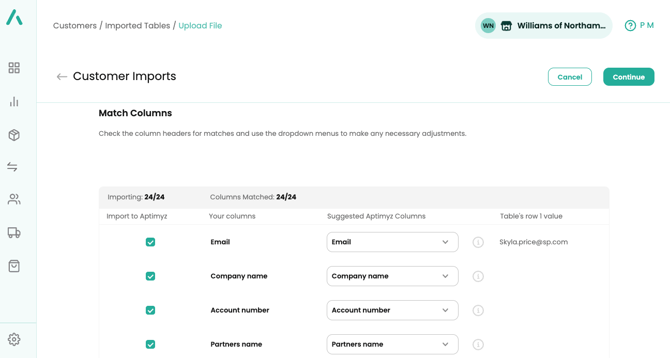
10. Check that the Row Values match with the Aptimyz Columns. This confirms that the names, email addresses, loyalty points, discount etc. will be imported to the correct positions
11. Select Continue
12. Select Proceed

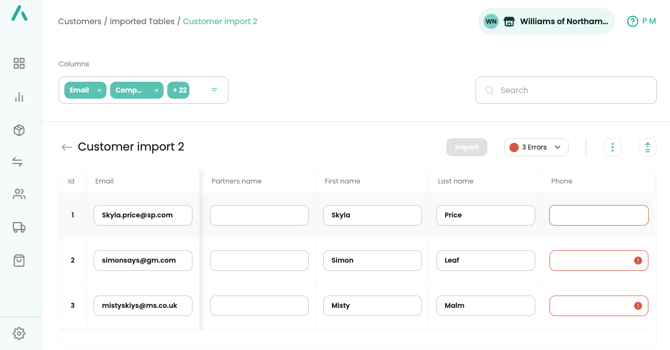
13. You will then be taken back to the main screen. If errors show, this will need to be corrected before the import can be completed 
How to Fix the Errors
- Select Edit
2. To view the errors, select the red dot with 'Errors' to show a dropdown box of fields that need to be corrected
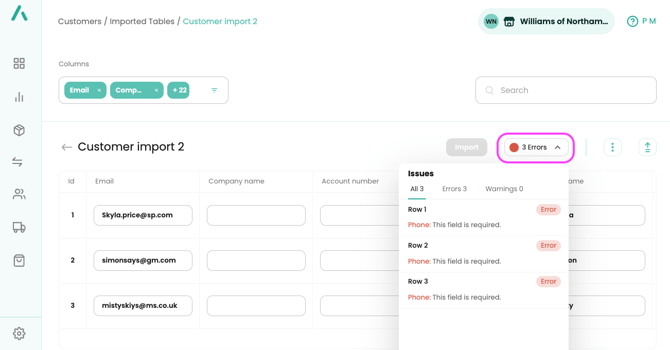
3. To be taken to the error, click on the error shown for the highlighted box to show
4. Once the errors have been fixed, select Save
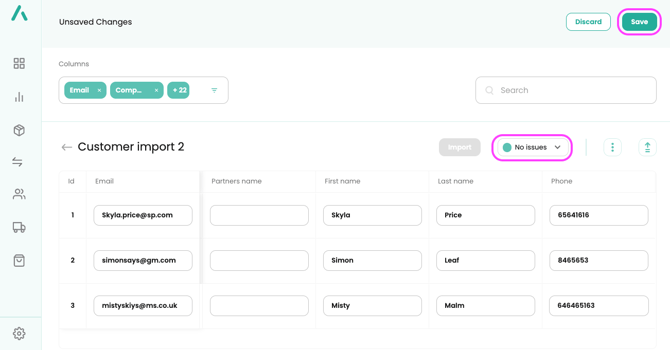
5. Import will then appear as green to show that the data is ready to be imported
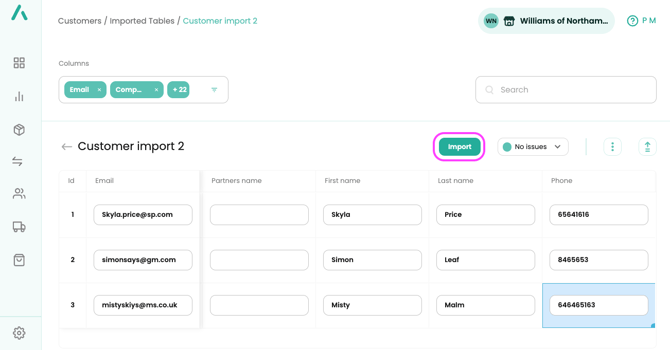
6. Select Import
7. Select Continue
8. The status will show as importing and will continue in the background. Once the import is complete, you will receive a confirmation email
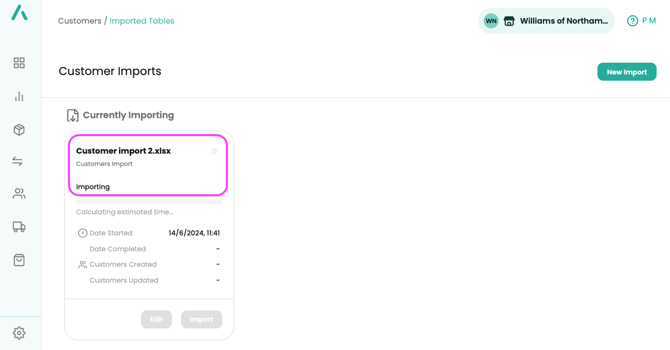
9. The status will update to Done and you can now view your customers from the Customer screen