![Copy of STATIC 1.png]](https://help.aptimyz.com/hs-fs/hubfs/Copy%20of%20STATIC%201.png?height=50&name=Copy%20of%20STATIC%201.png)
Aptimyz gives users several opportunities to add further information to the online product, before sending it to the Ecommerce site
Users have the option to add extra product text in Aptimyz
Users can also change the online descriptions of any attributes from within Aptimyz and these will be sent to Ecommerce as the attribute description or even the variant names.
Product Page
- On a web browser, log in to your Aptimyz account
- Click Inventory
- Click Products
- Click Add Product
- Click Add a new product
- Move the Ecommerce button to "on" (highlighted in green)

- Search for/Select the correct Product Group
- Fill in mandatory fields (the Items with a * against them - Product Name, Brand, Supplier).
- Tax Rate - Standard Tax rate applied to Product
- Retail Price - Retail price (excluding or including Tax depending on settings)
- Cost Price - Net purchase price per unit excluding Tax
- Online Price - this field gives you the option to charge a different price online to that instore
- Online Clearance price - complete this field if you want to add a sale price to the website.
- If necessary, add an alternative price for online only. (If you do not add a price, the system will automatically apply the retail price as standard)

- Click on the arrow next to Extras
- Fill in a product description. This will be sent to the website as further description for the product.
Variants Page
- To create variants - click on the Single Variant button on the main page. This will automatically give you access to the Variant pages
- Type an Attribute name e.g., Color, Size, Length, etc
- Add in the variant names e.g., Blue, Red, etc
- If you need to rename either the attribute title or any of the variation names, tick the box to the right of the variant list.

- A modal window will open

- Type any changes into the boxes shown next to the variant name
- When you have saved the product and review the file - the new names will be seen on the 3rd Variant tab

- If any different online prices have been added, these can be seen on the 2nd Variant tab

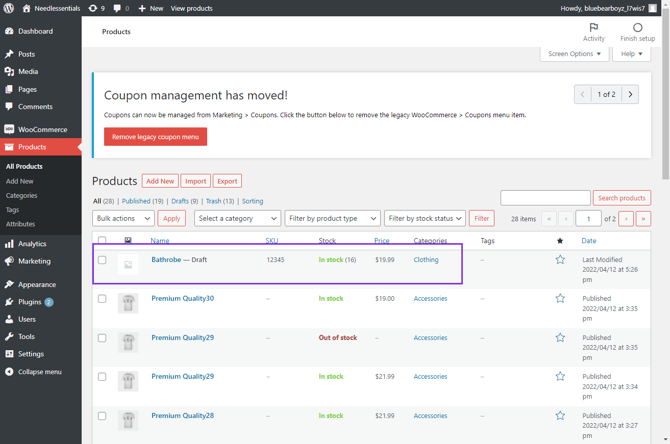
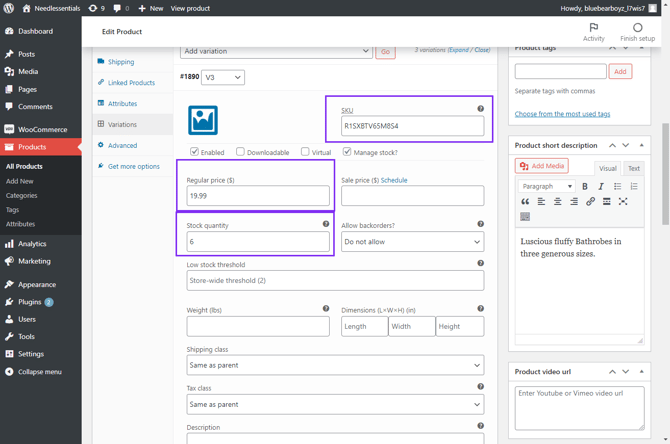
Website view of Ecommerce product from Aptimyz
- The following images show the product details that have automatically be sent to the website software.
a) The product is saved in the website as a Draft product
b) Any description typed into Aptimyz Ecommerce Description is shown in the detailed description box.
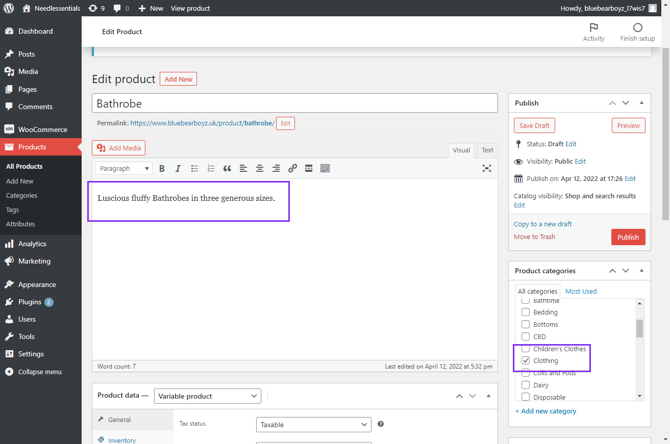
c) Variables are reproduced with the name given in Aptimyz
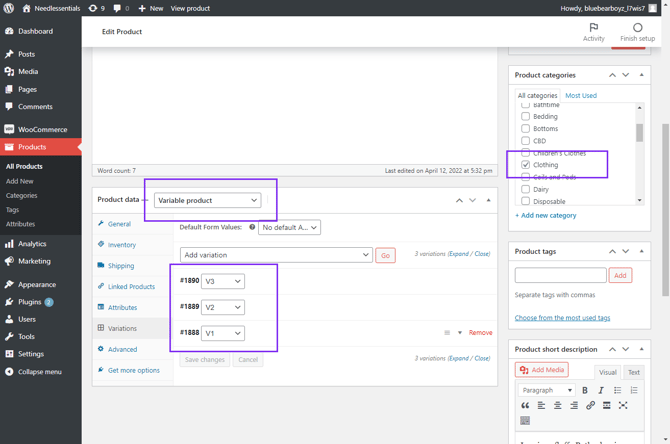
d) The Website product has the SKU from each variant line in Aptimyz, the Price from the Online Price field and the stock quantity from each line.
2. Make any adjustments necessary to the website description and images and publish.
3. To see the Ecommerce ids in your Aptimyz system, return to Aptimyz Products
4. Click on the Data Fields button and select Ecommerce Variants
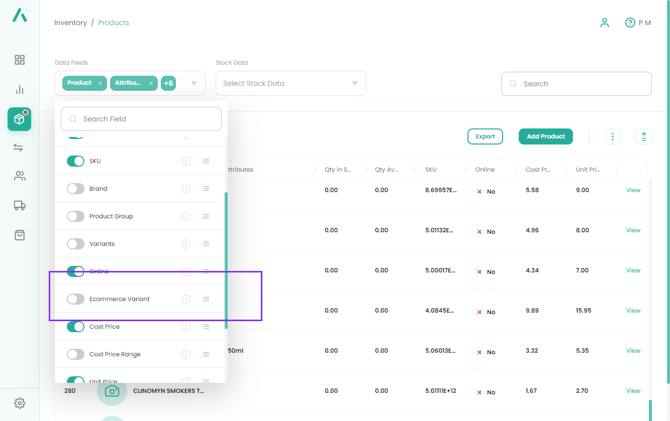
5. The product screen will then display Ecommerce id numbers for each Ecommerce variant

This is the end of the article